Give Back
Protect your place in the world
Petersen believes video games are an ideal way to not only teach Lakota, but revitalize it. “In video games, you can put every medium you can think of on a screen in an interactive manner at the same time,” he says. He intends to immerse players in “the experience of being in a culture where that language is alive, and not just history.”
Molly C. Beer from The next chapter of Indigenous representation in videogames
There were some couple-week-old Yukon gold potatoes with nub-like light green sprouts along their still smooth skin. With a discarded tool, I sliced the potatoes in half width-wise away from the sprouts. With a short rusted shovel, I dug a hole with a depth about the length of two hands. I then expanded and dug a small trench. I placed each half in the ground with the flat side down and replaced the soil.

I had tossed some old potatoes on a makeshift compost heap about a year ago. In the heavy rain, they went under a blanket of mud and grew rapidly in the slightly alkaline, sandy soil. While the soil lacked nutrients for some other plants–roses and lemons grew inconsistently–potatoes took a short time to grow.
With a soil test kit, I tested for pH and also nutrients in the soil. Plants need three main things to grow: light; air; and nutrients (food).
The test kit helps test for three major nutrients: Nitrogen (N); Phosphorous (P); and Potassium (K) (Potash). Different plants require each nutrient to a different degree for optimal growth.
I filled one-fifth of a clean jar with a soil sample. Then, added clean water to the brim, put the lid on, shook it, and let it settle. A fine clay soil will take much longer to settle than a coarse sandy soil. It took about 30 minutes to settle (another indication that the garden has sandy soil).
I used a dropper to pull liquid from the soil mixture, put in respective chemicals, shook each tube, and waited for each to turn a color. I compared that color with color gradients in a chart. I concluded the following:
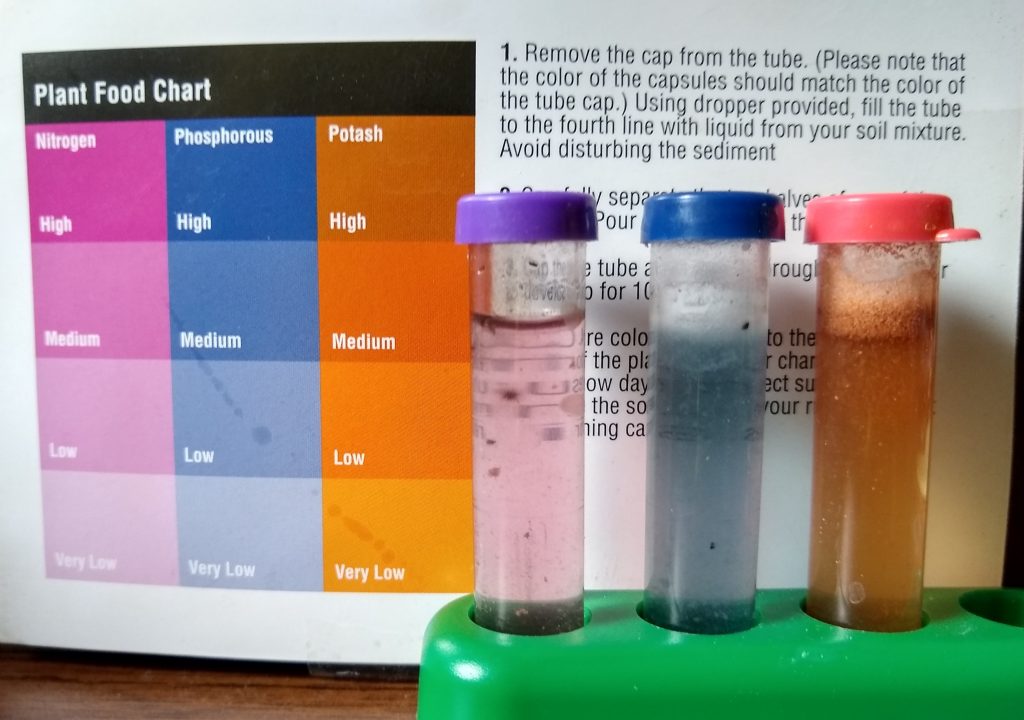
The soil test kit provides recommendations for supplemental food (fertilizer) in a table. The rows of the recommendation chart are for the type of plant (lawn, fruit, flower, etc.) while the columns are for Very Low, Low, Medium, or High amounts of each nutrient.
There are different tables for feeding prior to planting and feeding established plants and beds. The table for established plants indicates that a fertilizer (food) with 8-6-8 mix of Nitrogen, Phosphorous, and Potash works for the plants in the soil area tested. The numerals indicate ounces (weight) /100 sq. feet.
This triad numeral is usually in bold on the back of any fertilizer (food) you purchase. With this information, I can purchase an appropriate fertilizer for the soil area tested. But how to apply this fertilizer is another topic!
Before digging up soil for a pH test, I read the definitions for three different types of soil.
I held a handful and went back and forth between these definitions. Because there were crumbling clods of dark soil, clumps of sand, I settled on sandy soil. The soil did not have fine particles, but did have some clay.
We can use pattern on a leaf to identify its tree. Let’s start by zooming in to a leaf and working our way out.
Now after looking at the leaf by itself, let’s zoom out and identify how the leaf is arranged on the stem.
A perennial that bears fruit all year.
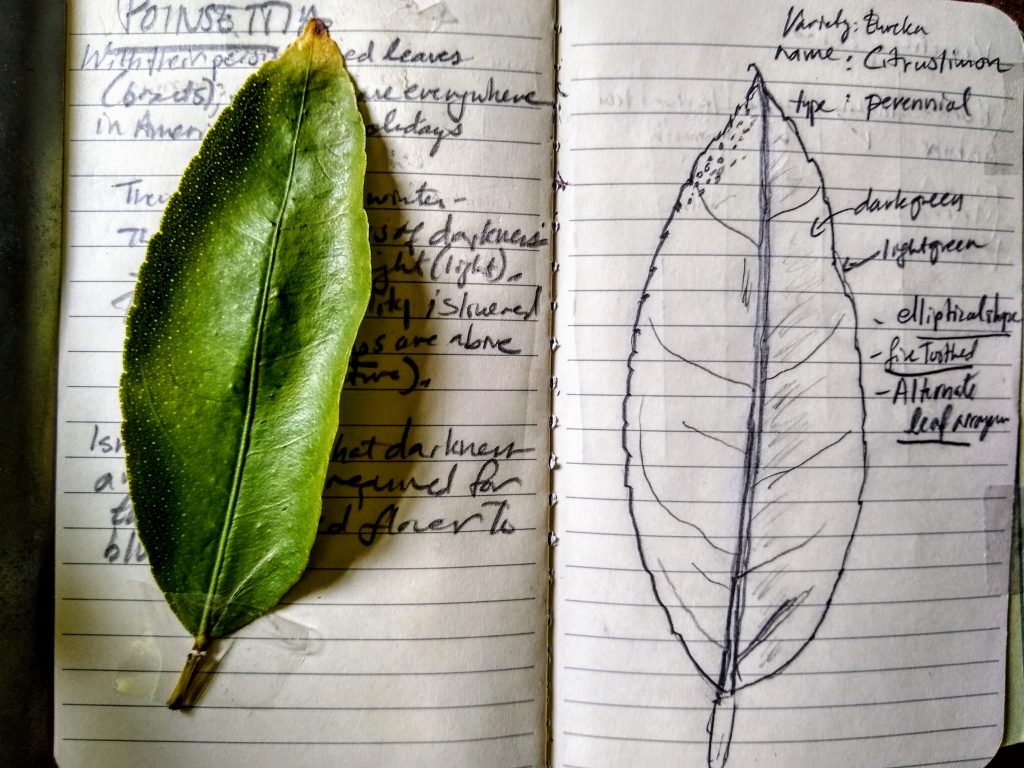
Alternate arrangement on the stem. One leaf per a node, or connection to stem.
In December 2018, I checked the pH of soil in the garden. With a testing kit, I found that the pH was 7.5. Above 7 is alkaline; below 7 is acidic. With a pH reference list, I found that most plants I planned to grow required a pH of around 6.5-7.
So, I added compost to increase the acidity of the soil. With compost, the acidity dropped nearer to 6.5-7.
I repeated the test today (12/30/2019). I obtained a soil sample around 3 inches deep, placed a small amount in a test tube, added a chemical provided, and added water. I put a lid on the test tube, shook the test tube, and let it settle.
The color turned a darker green. I then compared this to a chart provided and determined that the pH was a little above neutral (7). I concluded that the pH was around 7.25.
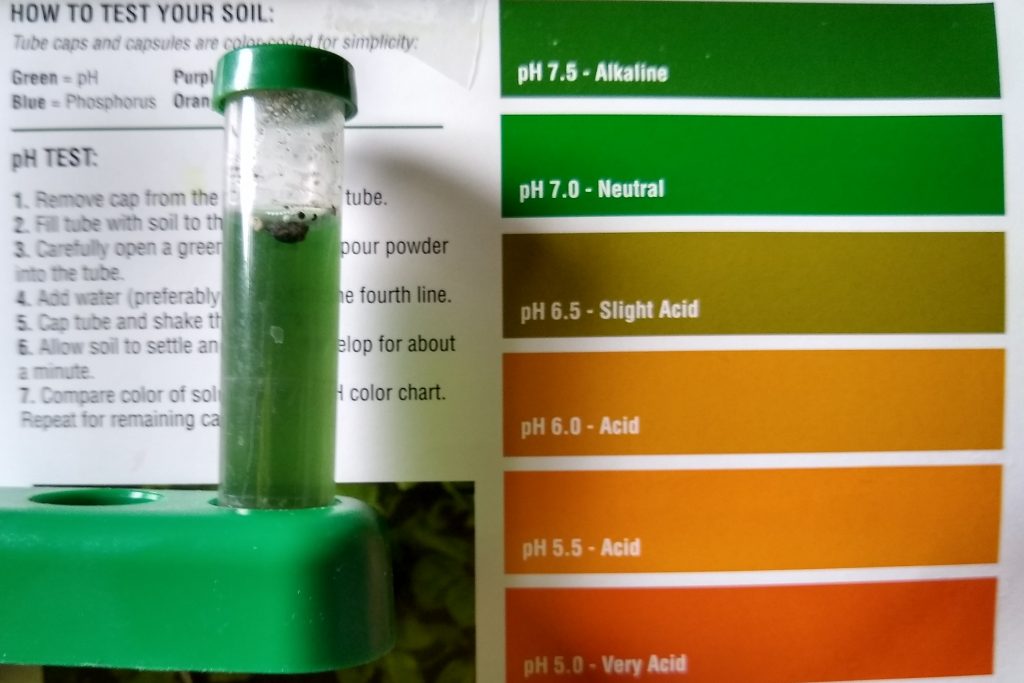
With a pH preference chart, I found the suitable pH ranges for the plants in the garden.
After checking the pH preference, 7.25 is a little too alkaline for the peppers. I will add compost this year as well.
Repeat 1-3 on the opposite side so just the timepiece remains.
Redo the cover, clasps, and axles of the strap.
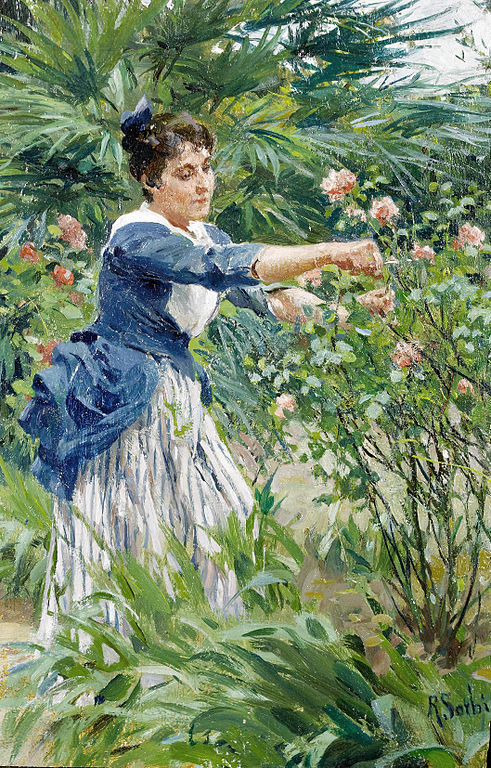
Roses need air and sunlight to prevent disease. By pruning a rose in an urn-like shape, you promote a flow of air and give leaves more exposure to sunlight.
You prune or cut dead and small stalks during a slower blooming period, generally winter.
• With a small shovel, dig up soil around the bud union, the bulbous uppermost portion of the root.
• Find gray, dead stalks. Cut them out from the bud union.
• Find stalks smaller than the diameter of a pencil. Cut just on their outward-facing thorns at an angle.
Click here for more on pruning from the Seattle Rose Society.